How To Install A Solar-Lighted Post Cap

Install your solar post caps easily by following these simple installation instructions. In no time, you can transform and elevate your backyard space by adding these caps to your deck, patio, or fence.
Some tips before installation; our solar post caps require direct sunlight to achieve a full charge. Reduce the risk of dim or partially charged post caps by ensuring all your solar lights are exposed to direct sunlight throughout the day. Also, avoid installing these post caps by outdoor lights or windows, as the shine will confuse the transition of the light to turn on. Allow your lights a full day of charging to see true results.
Installation Instructions For Solar-Lighted Post Caps
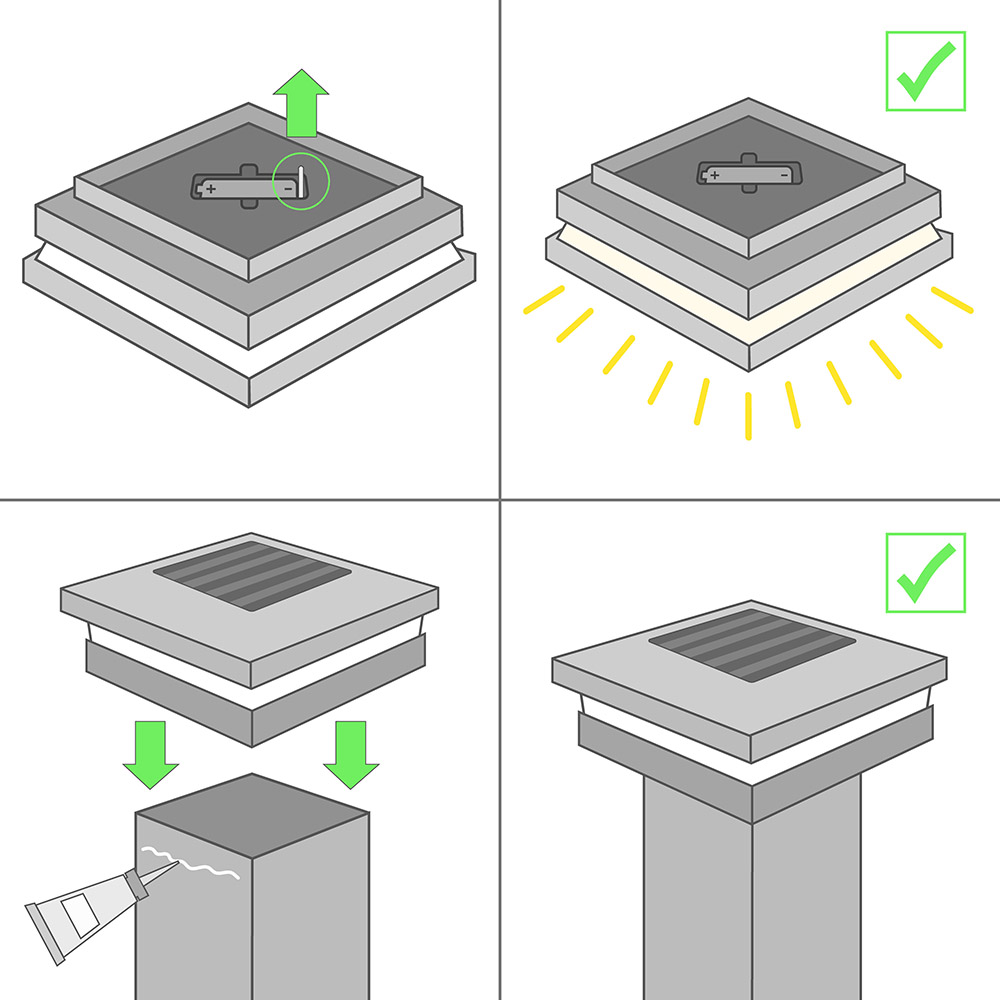
- First, remove all tabs from solar post-cap batteries. To test your solar post cap to verify that it works, place it upside down or cover the solar panel. This should trigger the light to turn on.
- If your light does not turn on, the battery may need to charge or is possibly faulty. Allow the battery to charge for 24 hours before testing again.
- Once your solar post cap has been tested and works, you will be able to install.
- Place your post cap onto your desired post and secure it with vinyl or wood glue.
Cleaning and Protection Tips
Extend the longevity of your solar post caps by adequately caring for them. Remove the cap from its post when your light seems to be dimming or not working correctly. Then remove the battery from the module. Taking a cotton swab or your finger, gently apply petroleum jelly or di-electric grease to the battery on all sides. This will help to prevent harmful corrosion over time.
