How To Wire Low Voltage LED Post Cap Lights
Knowing how to wire low voltage LED post cap lights can look like a real challenge, but we are here to help make it a simple process. All of the wires in the LED post cap harness system are plug and play, and it is very easy to hook them together and unhook them.
Please note that we only use two post caps for this demonstration, but the process is the same whether you have one cap or 100.
Click here for the following instructions in PDF form:
Harness Setup ManualAlso, you can check out our video installation guide! It will walk you through each step of installing LED Low-Voltage Post Caps and give you a thorough visual guide for the entire process.
Materials:
Pre-Wired LED Post Caps |
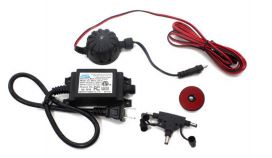
Power Supply |
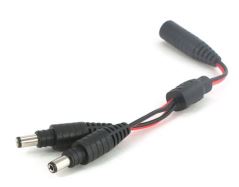
Output Splitters |
Harnesses |
|---|---|---|---|
LMT offers a variety of styles, sizes, and colors. For your post cap lighting layout planning, count up your posts to see how many post caps you will need. Popular styles include: |
Choose a power supply based on the number of post caps your fence will need. | While most people will use two output splitters, the configuration of your posts can help you determine if five output splitters are right for you. | There are various sizes of post cap light wiring harness kits. |
 |
 |
 |
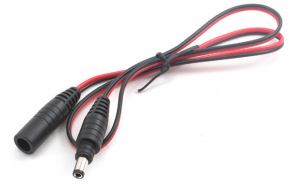 |
We highly suggest for every LED post cap you purchase, you also purchase 2 Harnesses and 1 Splitter. The size of the area and how far apart the posts are will determine the cable lengths you need.
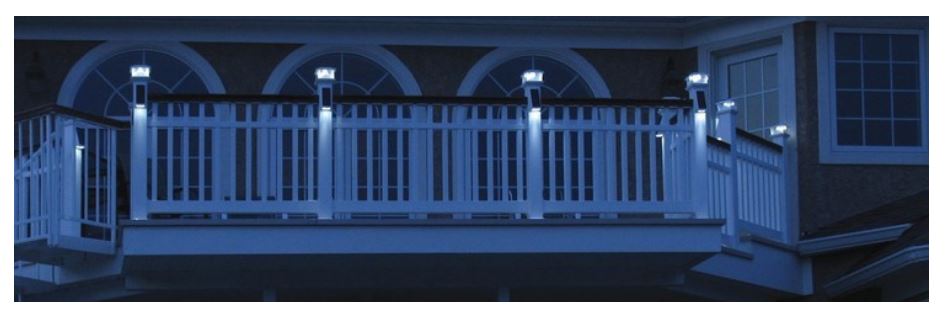
End Result:
This is what the end result of your wiring will look like. Most of the red wiring harnesses will be hidden inside the fence posts. The gray box over the top of the wires represents this.
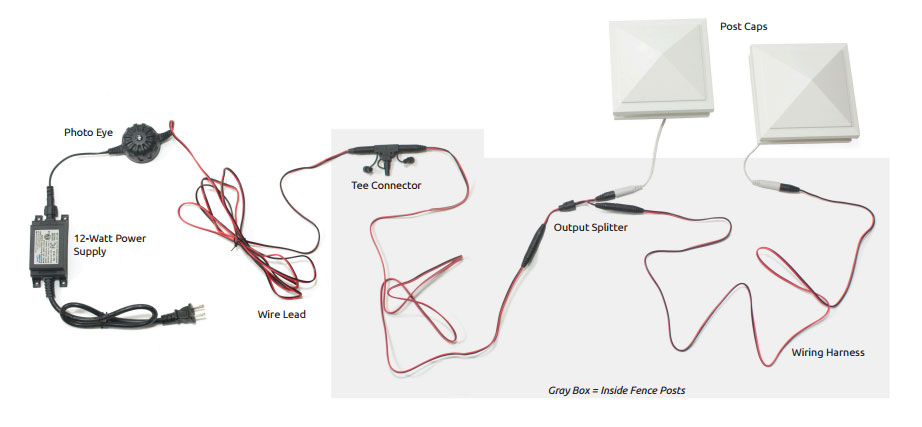
Step 1:
Take out all of the parts included with the power supply. Connect the power supply to the photo eye, the photo eye to the wire lead, and the wire lead to the tee connector.
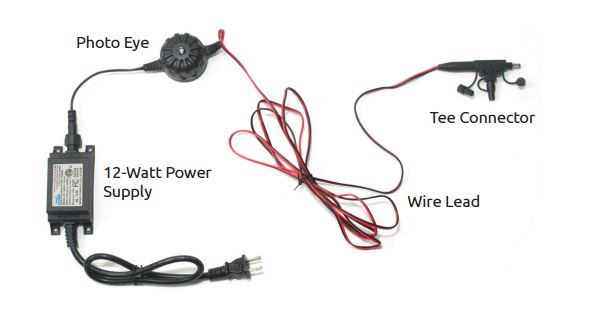
If you only install one post cap and the included wire lead is long enough, attach your post cap directly to the tee connector. In most cases, you will skip this.
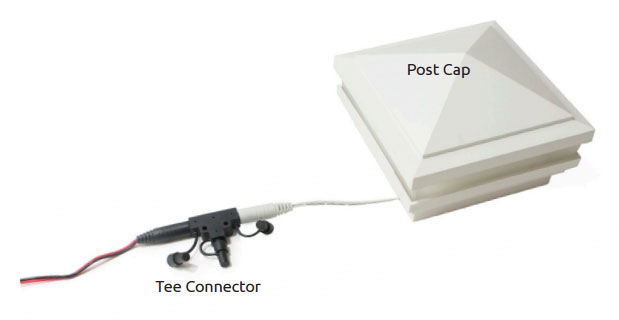
Step 2:
If connecting multiple LED post caps, connect a wiring harness to the tee connector (included with your power supply) and an output splitter to the harness. Connect your 1st post cap to the output splitter.

Step 3:
Connect another wiring harness to the output splitter. Connect your next post cap to the harness, which is another word for a low voltage post cap extension cable.
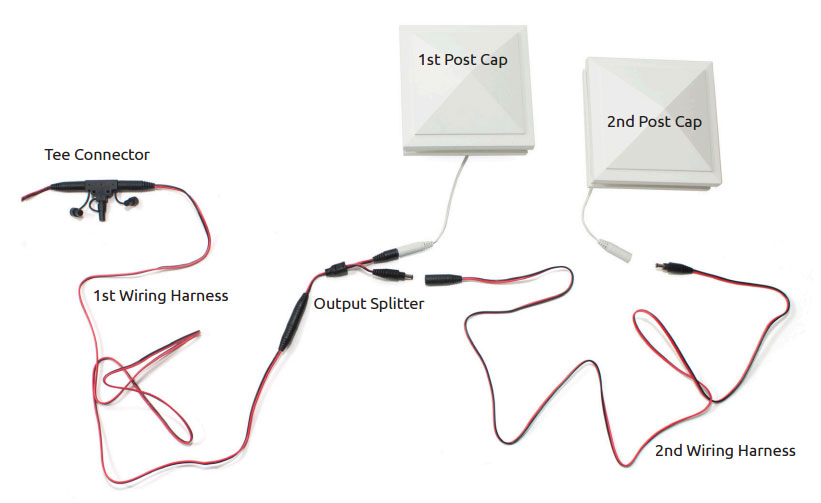
Step 4:
Keep connecting your post caps using the same steps. Remember to insert each wire into the fence posts as you go along. The result will give you a beautiful, lighted, and wire-free (to the eye) fence, deck, or patio.
How To Wire Low Voltage LED Post Cap Lights Printable Instructions:
Page 1 Page 2Additional Splitter Information:
Harness/Splitter Info